

How To Set Sequence Settings In Premiere
So you've opened up Premiere Pro and you're ready to dive into your edits.
Y'all've already imported all your footage and you're about start laying out those first few cuts.
Now it'south time to create a new sequence for your video projection.
But when you go to create your first sequence, the options are countless. Which settings will you cull?
What if you don't notice exactly which sequence matches your camera? Or what if y'all aren't even sure which one matches? What are the best options for YouTube videos, large presentations, social media, or the myriad of other options?
In today'southward postal service we are roofing everything you need to know nigh sequence settings in Premiere Pro, so you lot'll exist able to option exactly the best settings for each and every project you create.
If yous don't have a copy of Premiere Pro all the same, y'all can try it out for free here.
1 | What is a Sequence in Premiere Pro?
Before we become as well far into the weeds, information technology's of import that y'all know exactly what a sequence is so you lot'll be able to brand the best decisions in regard to how y'all want to gear up your own projection sequences.
A sequence in Premiere Pro is simply a visual assembly of your audio and video clips that you'll arrange in any order you like inside the Timeline Panel.
The Timeline Panel is where you'll exist able to visualize your sequences (or sequences) and drag/drib your clips to arrange them how y'all'd like for your video.
Getting the settings correct for your sequence will determine the size, dimensions, resolution, and more for your final video.
Your video and sound clips can sit adjacent in a sequence or they can overlap and stack on top of multiple layers in a sequence.
Yous can too adjust transitions and furnishings within your sequence in this Timeline Panel.
Yous can create multiple sequences for each project and customize the settings for each of these sequences.
Premiere Pro allows y'all to adjust the settings for each of these sequences to customize the size & dimensions, resolution, frames per second, and more for your project.
Premiere Pro is too smart plenty to lucifer the exact settings of your existing footage if you aren't certain – I'll evidence you how in a minute.
ii | How to Create a New Sequence in Premiere Pro
First let's walk through how easy information technology is to create a brand new sequence in Premiere Pro.
There are several easy ways to start a new sequence and here are a few of them.
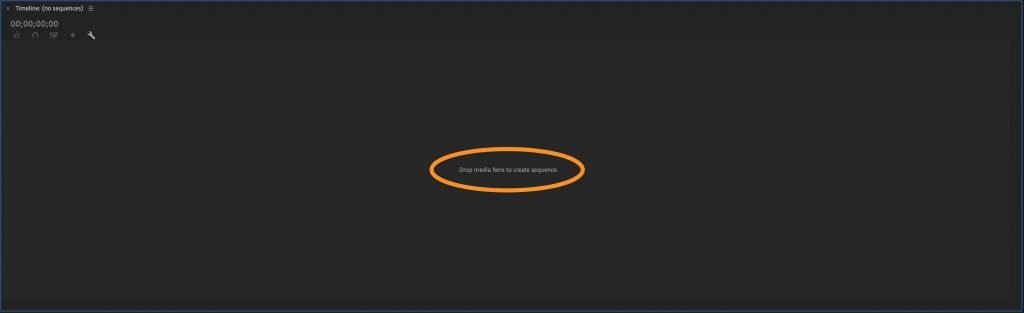
i | Drib your media directly into the empty timeline to begin a new sequence.
Why employ this method?
It'south the easiest and most straightforward. Use it when you know your footage settings volition match your final video settings.
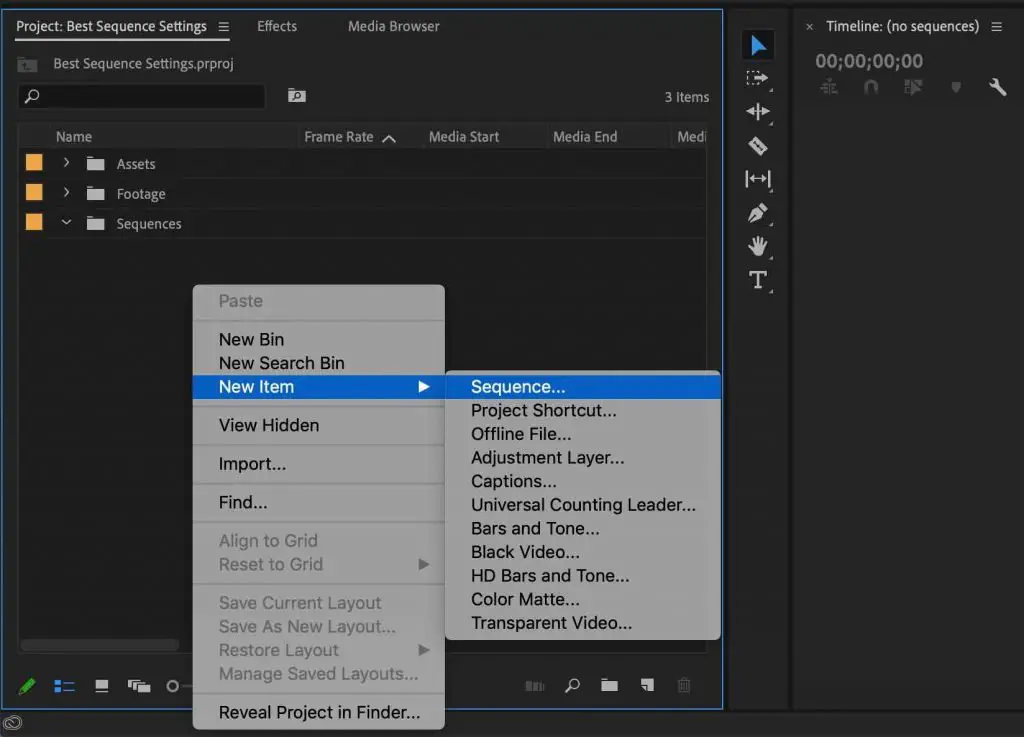
ii | Right-click in your Project Console and Click 'New Item' -> 'Sequence'
Why apply this method?
If you want to encounter all the options available to your new sequence then you can manually adjust any settings.
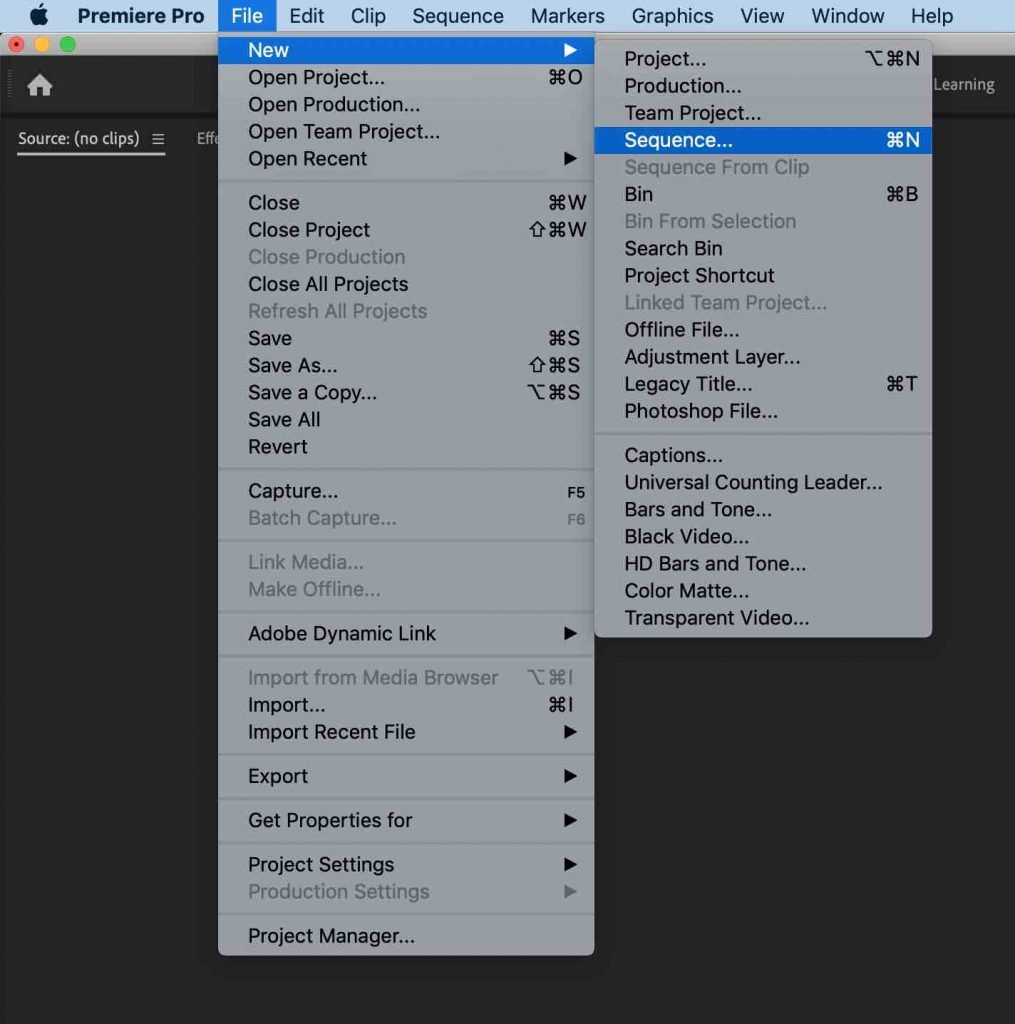
3 | In the peak main card, select 'File' -> 'New' -> 'Sequence'
-or-
Utilize the Keyboard Shortcut: 'Command-Due north'
Why use this method?
It gives you total control over your settings if y'all want to make any adjustments or create a new sequence setting preset.
4 | Drag Your Footage Into the Domestic dog Eared Box in lower left corner of the Project Panel
Why use this method?
It's the easiest and will automatically create a sequence that matches the settings of the footage you drag into the box.

3 | Best Settings for Sequences in Premiere Pro
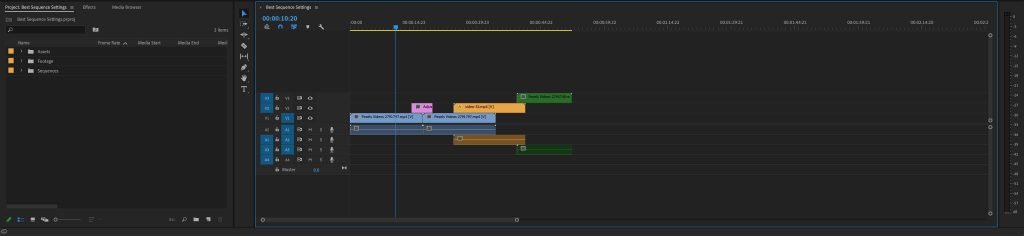
While creating your new sequence, you may have noticed the post-obit sequence settings window pop open.
(If you didn't, that merely means that Premiere Pro matched the settings of the footage you lot dragged into your timeline to create your sequence.)
Ninety percent of the fourth dimension, the easiest method is to allow Premiere Pro to friction match your sequence settings to your existing footage and not worry about the gritty details in this first window.
Unless you accept a specific setting in mind or y'all're having some other issue that you lot're trying to solve, you can simply skip down to the next section to learn almost how to exercise this.
However, in that location are some cases where you may want to take more control of your sequence settings.
In that case, let's comprehend all the options in this window and narrow down exactly what is best for your video project.
There are 3 main areas of settings that matter to us: resolution, dimensions, and frame rate.
Then which settings should you cull?
Before you can answer that question, you demand to know exactly what settings y'all'll want your output video to be.
We desire to lucifer our sequence settings to the settings of our final exported video.
Regardless of the settings your footage was shot in, you'll desire to set your sequence to friction match the settings that you'd similar for your terminal video. Then nosotros can tweak the footage to fit our settings in the sequence as we edit.
Allow'due south walk through this menu and discuss some of the near common settings you'll probably desire to consider.
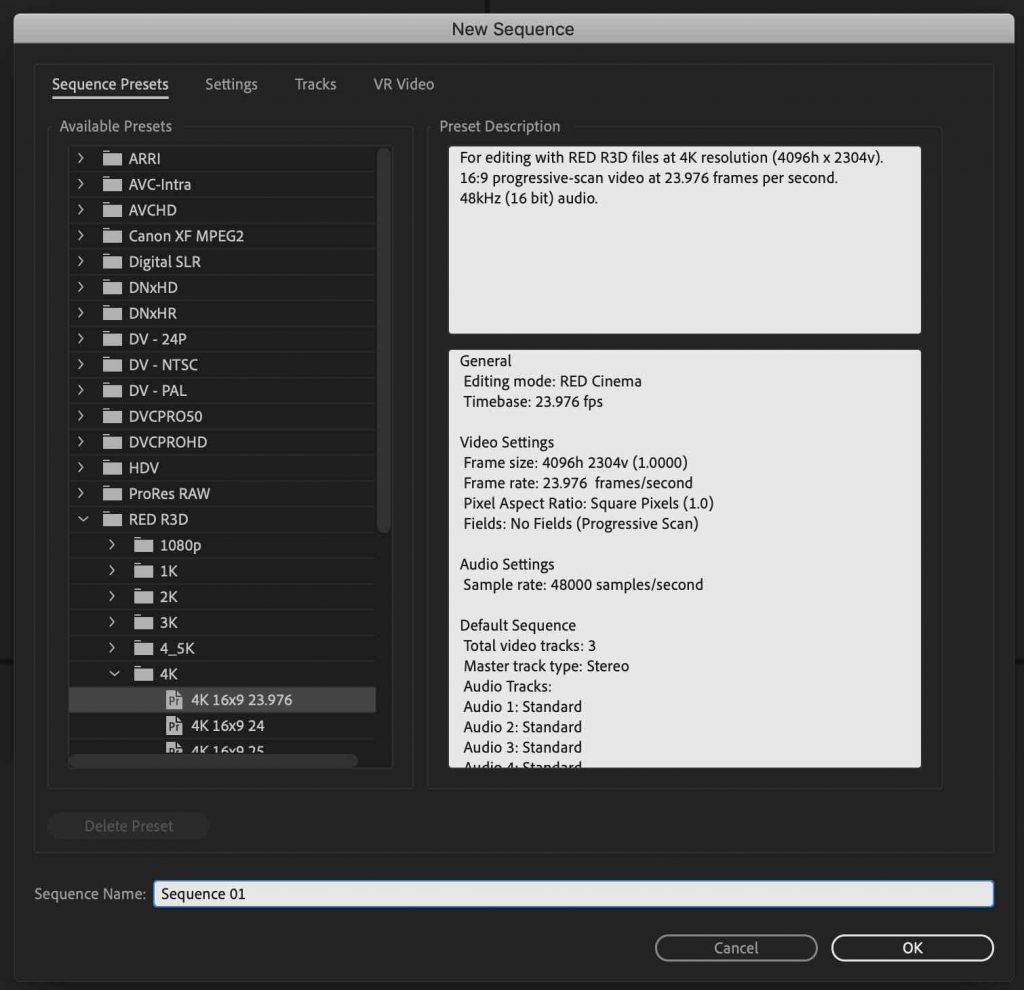
Best Sequence Settings for 4k Video
Step i: Hit command-n (on mac) or control-n (on pc) to open up the sequence settings window.
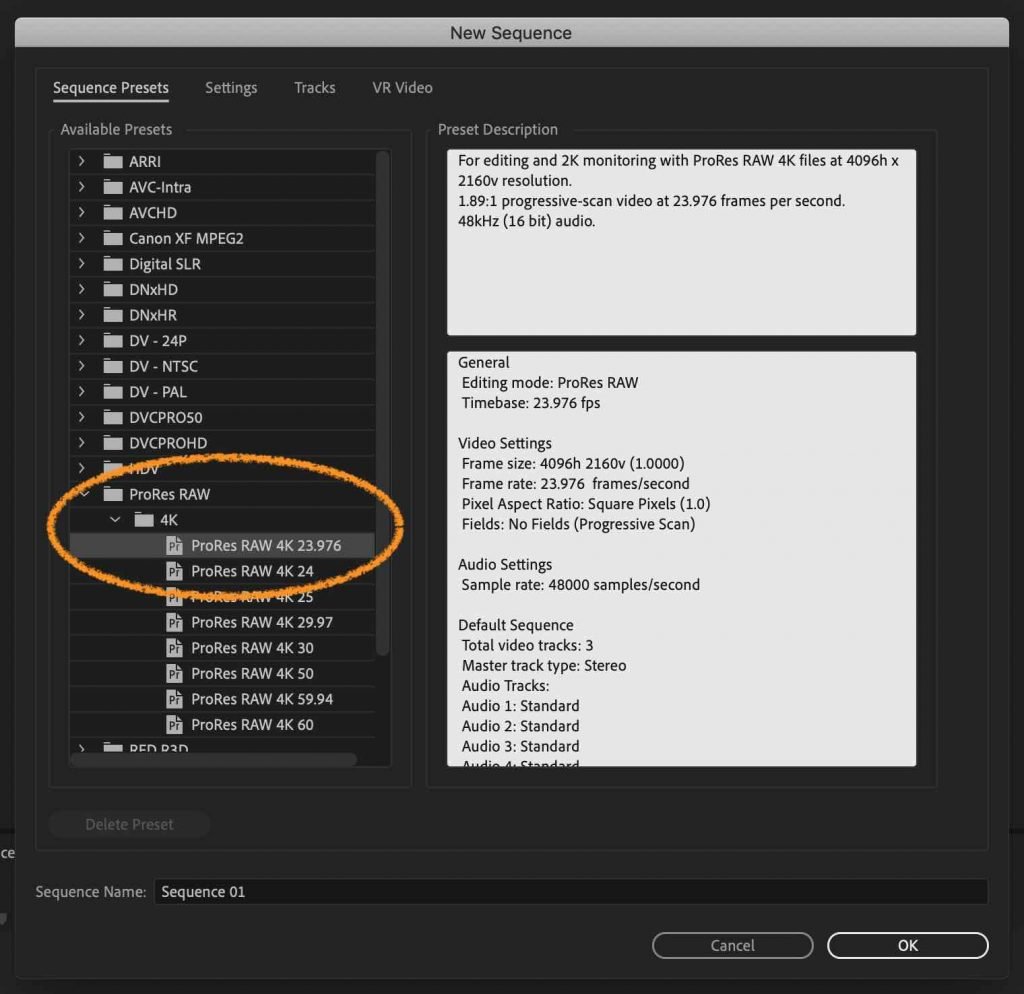
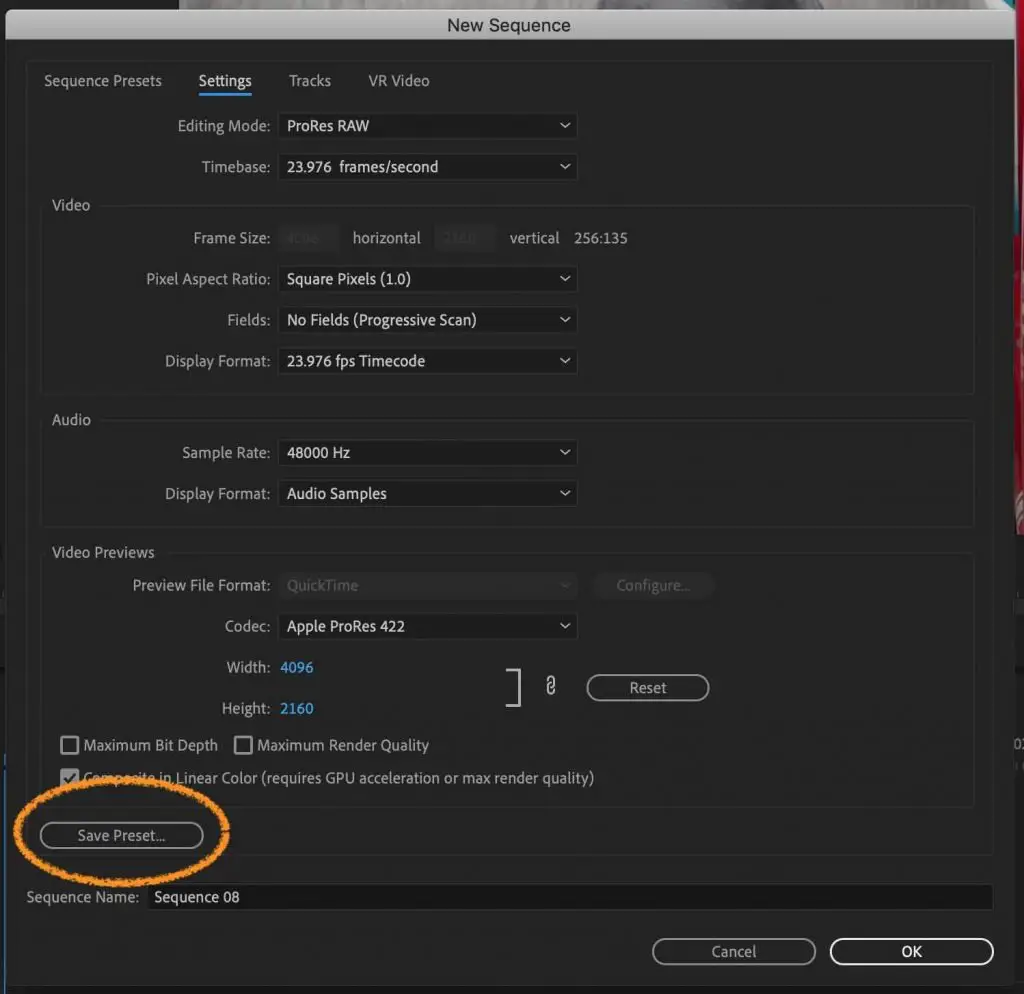
Step 2: On the left manus side, navigate down to 'ProRes RAW' and click the outset option for 'ProRes RAW 4k 23.976'.
(Note: if you'd like to choose a unlike frame rate to lucifer your footage/desired output, delight do so. In my stance 23.976 is the most natural and cinematic for real time footage, so it's ordinarily my preference, but not rule.)
Stride 3: Navigate to 'Settings' in the upper tabs to encounter more options for your sequence. Here you'll run across where y'all can change any specific option for this 4K preset. I am happy to leave it all as is. Match yours to what y'all see hither if it isn't already.
You lot tin can also relieve this preset for future use past hit 'Salve Preset' simply to a higher place the sequence name.
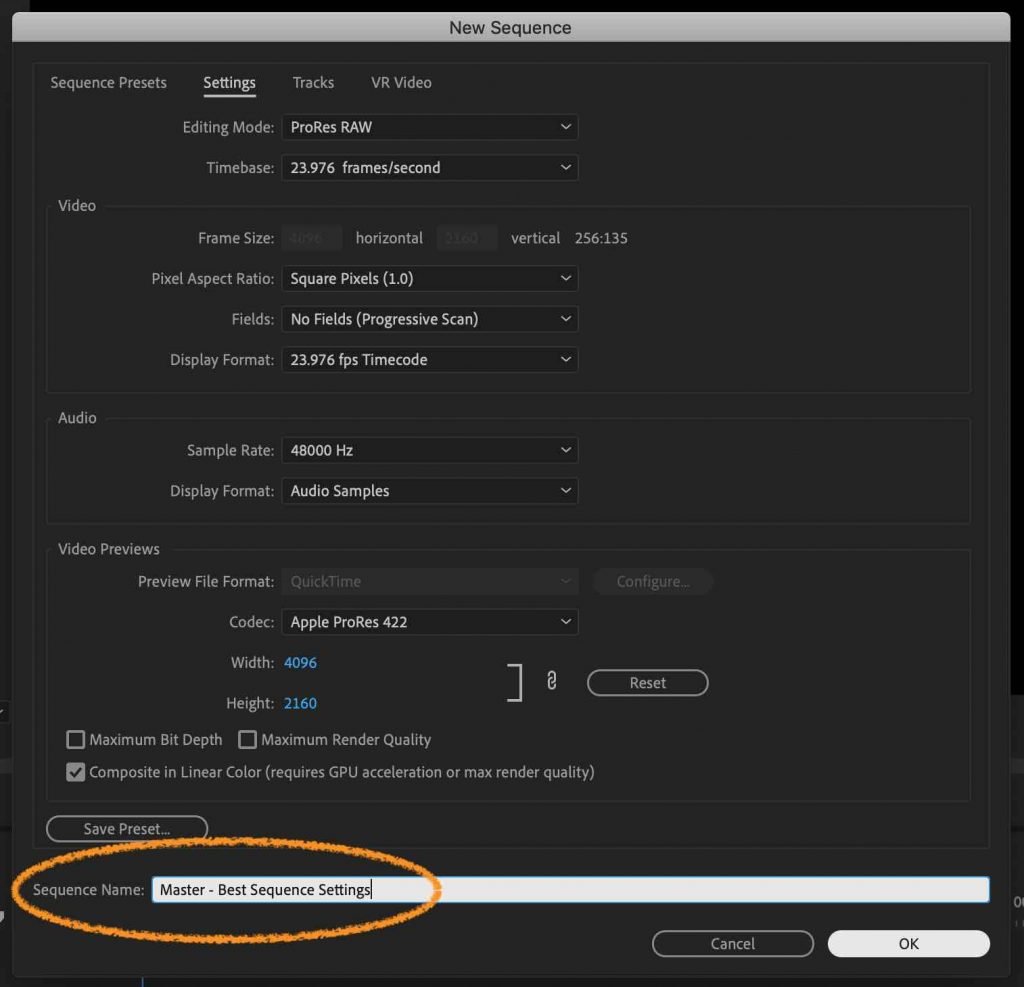
Step 4: Brand sure to rename your sequence at the bottom. I like to brainstorm with 'Chief – Project Name', but information technology'south completely up to you. So hitting ok.

Y'all now have a brand new 4K sequence with perfect settings ready to go. If always you want to tweak these settings, simply hit command-n to reopen the sequence settings window.
All-time Sequence Settings for UHD Video
This setting is very similar to the previous instructions for typical 4K video, except that our dimensions are going to exist slightly dissimilar.
Step i: Hit command-due north (on mac) or control-n (on pc) to open up the sequence settings window.
Step 2: On the left mitt side, navigate down to 'ProRes RAW' and click the kickoff option for 'ProRes RAW 4k 23.976'.
(Note: if you'd like to choose a unlike frame rate to match your footage/desired output, please do so. In my opinion 23.976 is the almost natural and cinematic for real time footage, so it's usually my preference, but not dominion.)
Step 3: Navigate up to the settings tab on the top and click the drop downwardly card for 'Editing Style'. Now cull 'Custom'.
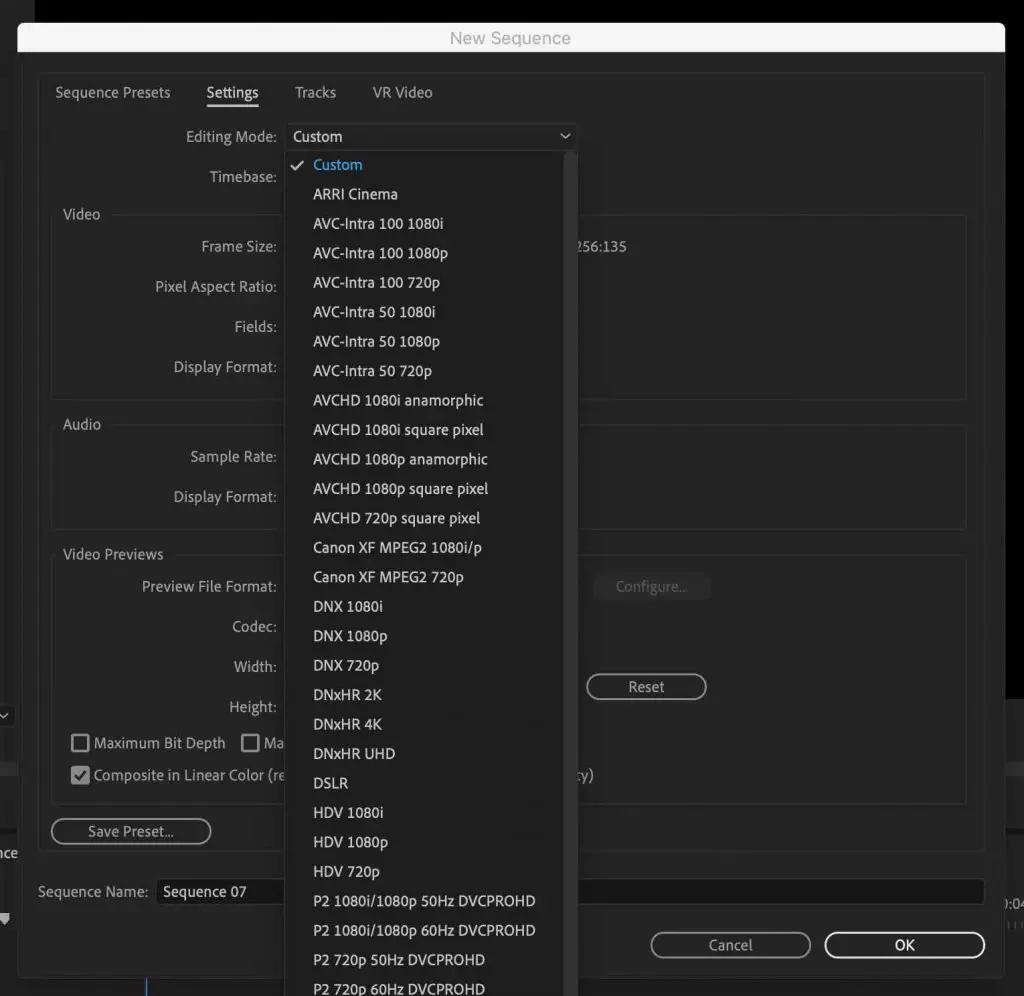
Step 4: Under Frame Size, you lot'll at present want to readjust the dimensions to be 3840 x 2160.
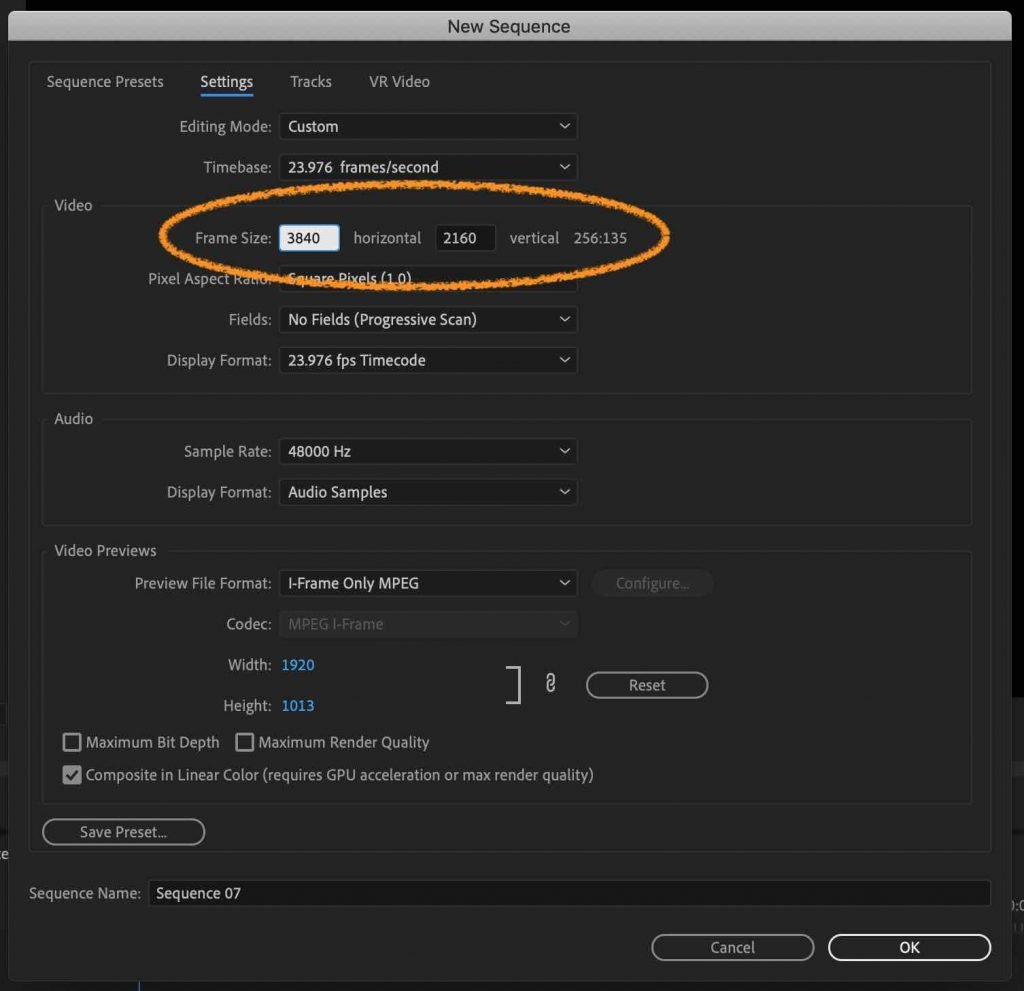
Footstep 5: Rename your sequence and salvage information technology equally a preset if you like. Once you are happy with the settings (the residuum you can leave as is), then hit OK to create your new UHD sequence.
Best Sequence Settings for Hard disk Video
Step ane: Hit control-n (on mac) or control-n (on pc) to open upward the sequence settings window.
Step 2: On the left hand side, navigate down to 'ARRI' and click the start selection for 'ARRI 1080p 23.976'.
(Annotation: if you'd like to choose a different frame rate to lucifer your footage/desired output, please do so. In my stance 23.976 is the nigh natural and cinematic for existent time footage, so information technology's usually my preference, but non rule.)
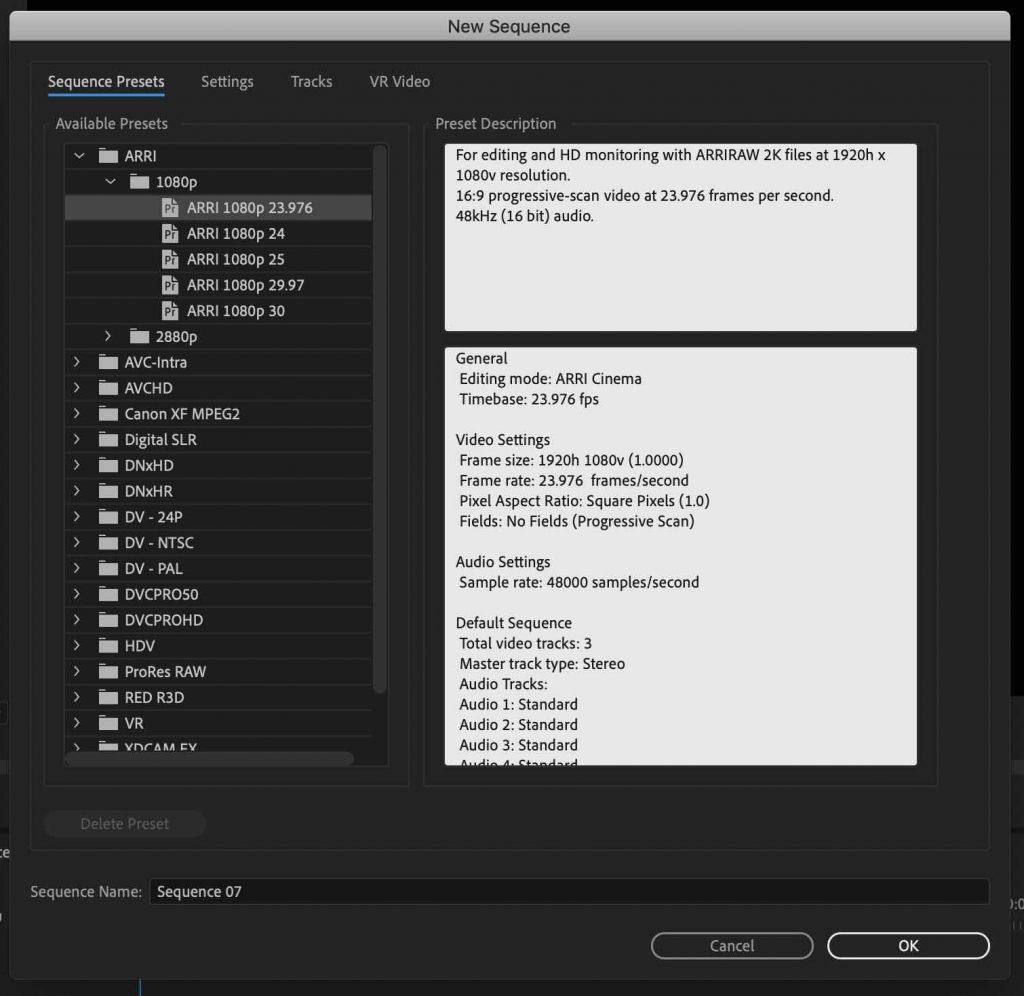
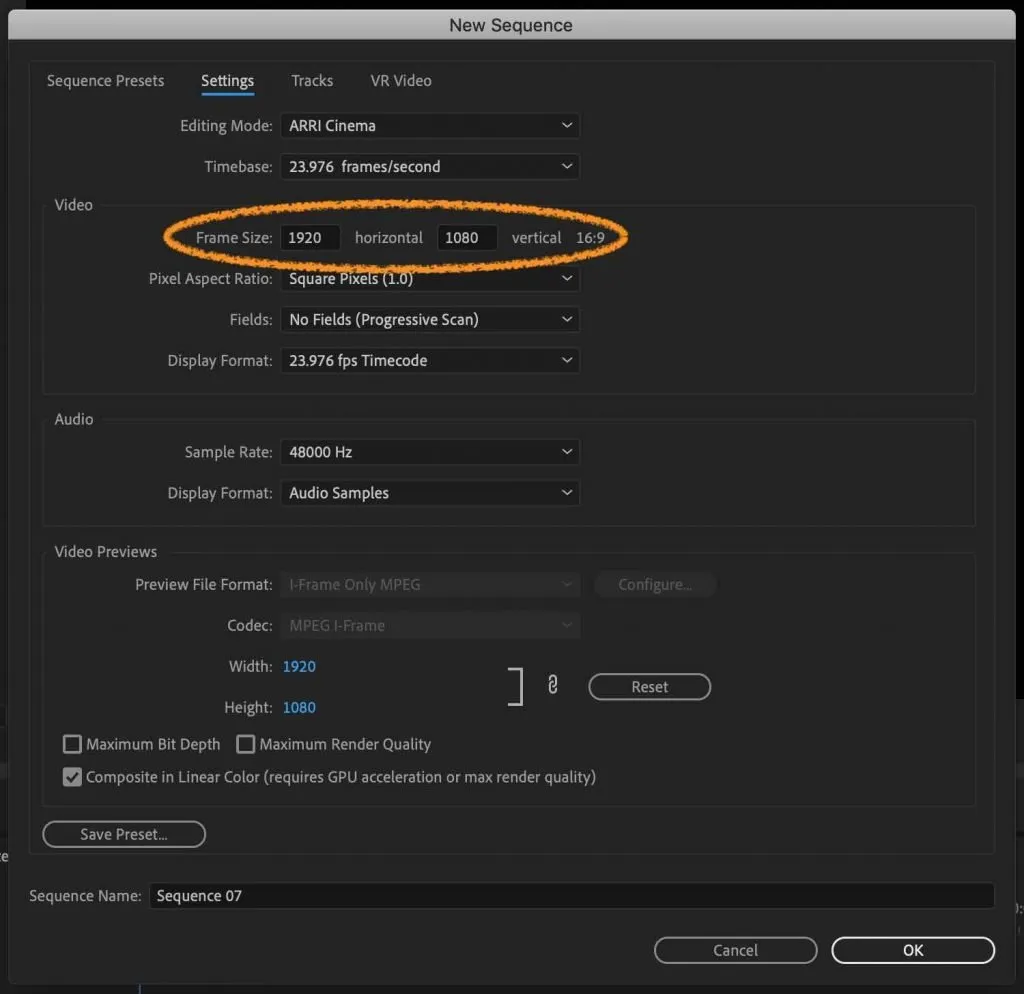
Stride 3: Navigate to 'Settings' in the upper tabs to encounter more options for your sequence. Here you'll see where you can modify any specific option for this Hard disk preset.
I am happy to leave it all every bit is. Match yours to what y'all run into hither if it isn't already.
You now accept a brand new 4K sequence with perfect settings ready to become. If e'er you desire to tweak these settings, just hit command-n to reopen the sequence settings window.
4 | How to Match Sequence Settings to Existing Footage
Like I said earlier, in well-nigh cases you don't even need to pay attention to the initial sequences settings for your project. You tin merely let Premiere Pro match the settings of the footage you'll be editing with.
If you want your final exported video to match nevertheless settings of the footage you'll exist editing, then this is the easiest and best method to apply for setting up your sequences.
Pace 1: Import your footage into Premiere Pro. (If you lot are unsure of how to do this footstep, refer to this blog post that will walk you through it starting time.)
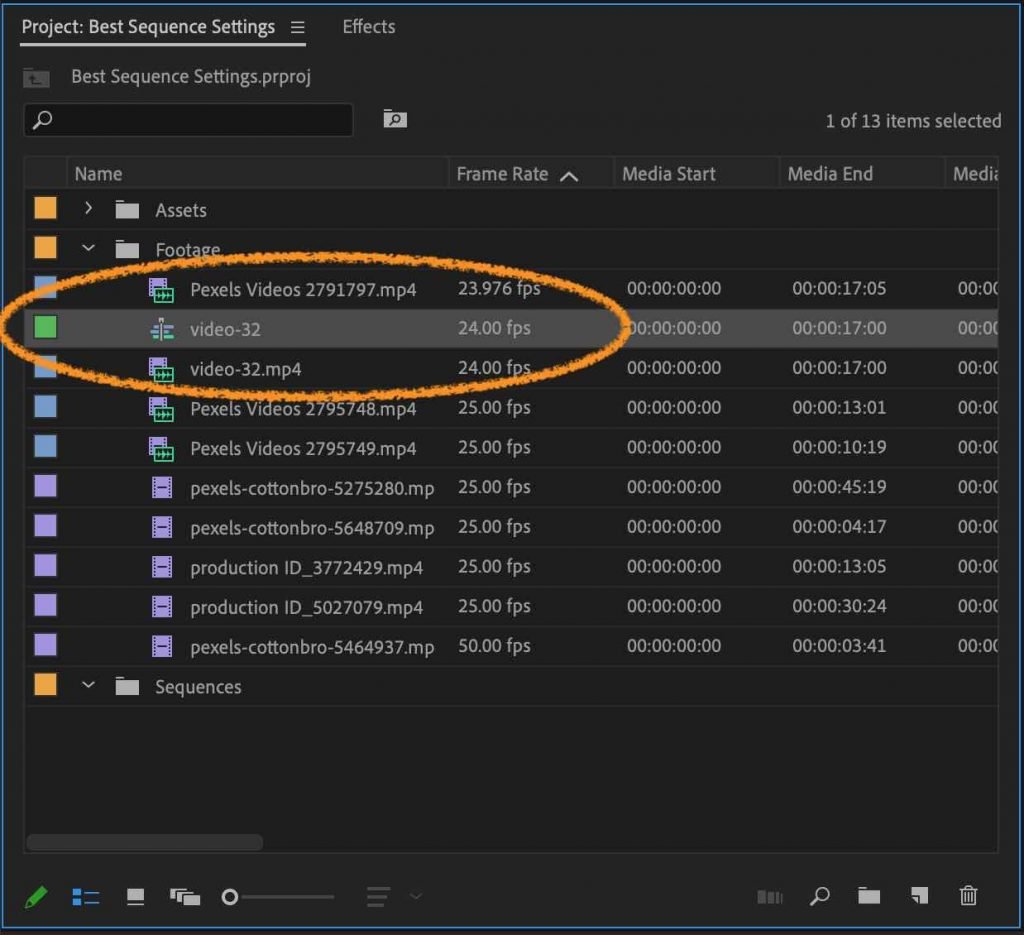
Pace 2: In your project window, drag whatsoever of your footage clips into the little dog-eared box in the lower correct hand corner.
Step 3: This will automatically create a new sequence which matches the settings of the footage that you dragged into that box.
Step iv: You'll see in your Timeline Panel that the clip of footage you dragged in is there. Y'all can either leave it in place if yous want, or you can delete it. Either way, your sequence has been ready perfectly.
Step 5: Inside the project window you'll detect that your new sequence has been created and named the same as the clip name that you dragged in.
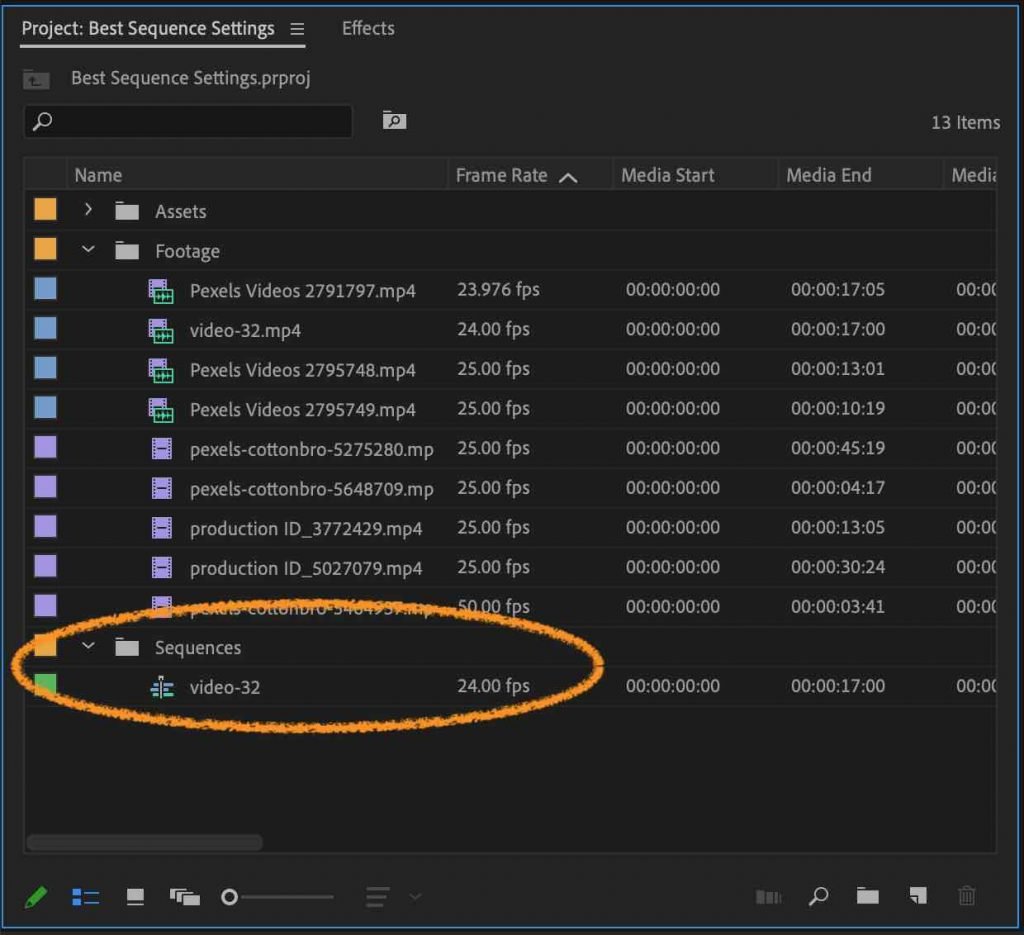
Footstep 6: Get organized. Allow's drag this sequence out of our footage bin and into a new bin that nosotros'll title: 'Sequences'.
Pace 7: Allow'southward rename our sequence. Double-click on the proper noun to highlight and rename the sequence.
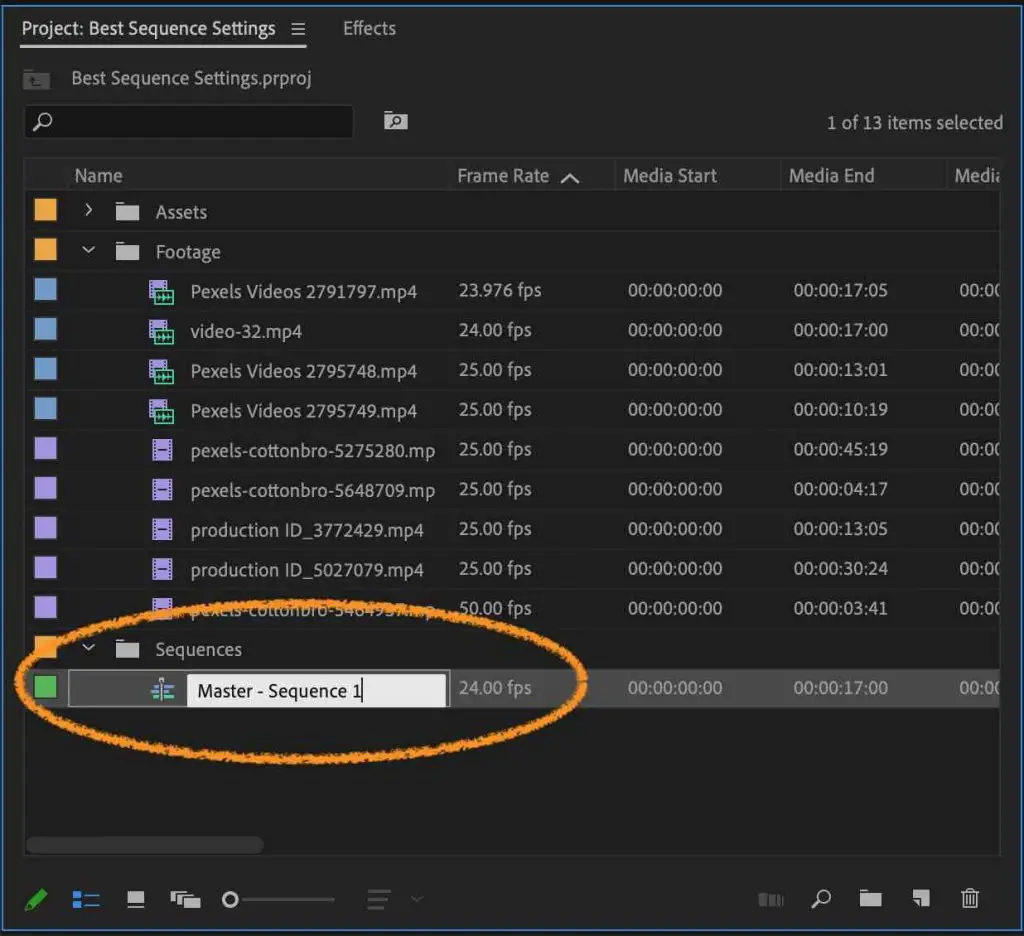
That's it. Nosotros've created our new sequence that matches our footage settings. Nosotros've renamed information technology and created a new bin where we'll keep any new sequences that we create for our project.
5 | How to Create a Custom Preset for Premiere Pro Sequence Settings
Step 1: Striking command-northward (on mac) or control-n (on pc) to open up the sequence settings window.
Step ii: On the left hand side, navigate downwards to which preset options you lot'd like to prepare for your projection. Click on 'settings' in the upper tab and specify any other settings that you'd like for your sequence.
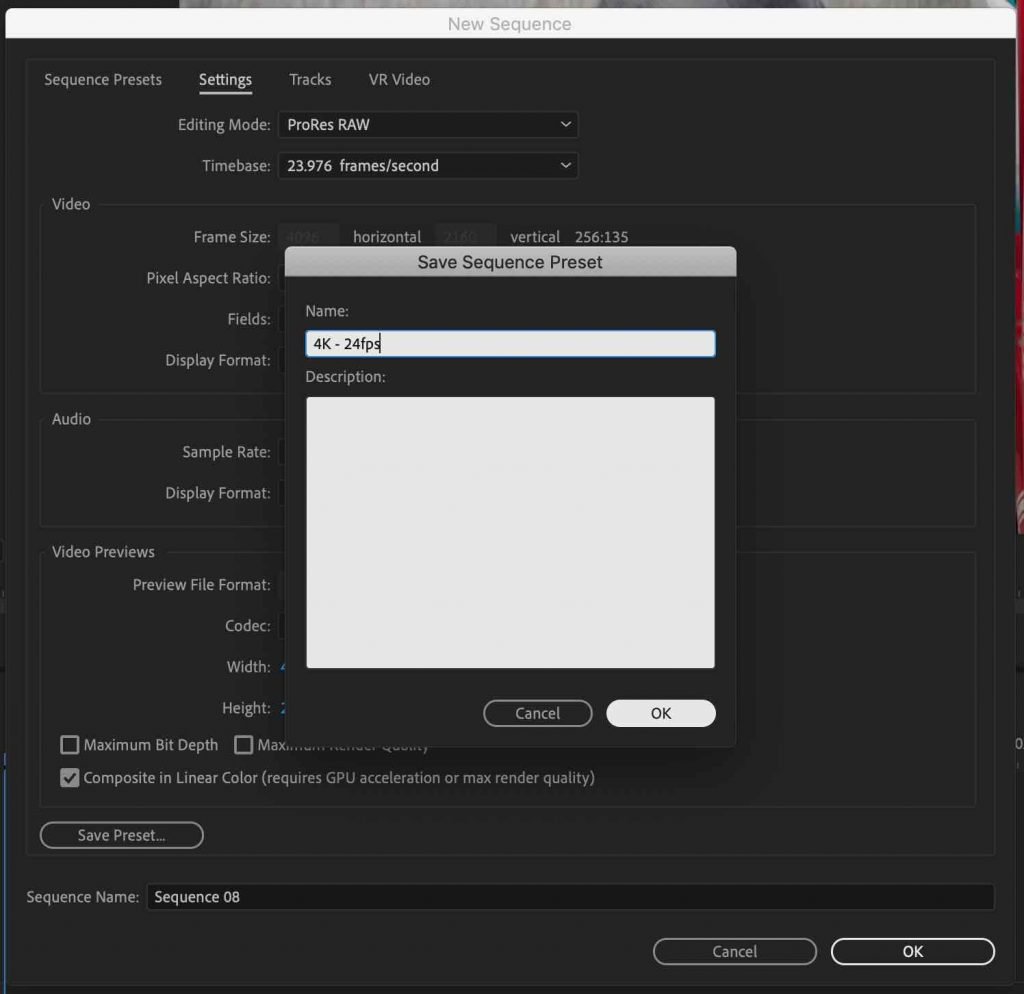
Step 3: Once yous have your settings as you lot'd like them, hitting 'Save Preset' at the bottom of the window.
Footstep 4: You can at present name your new preset and add any other descriptive words equally needed.
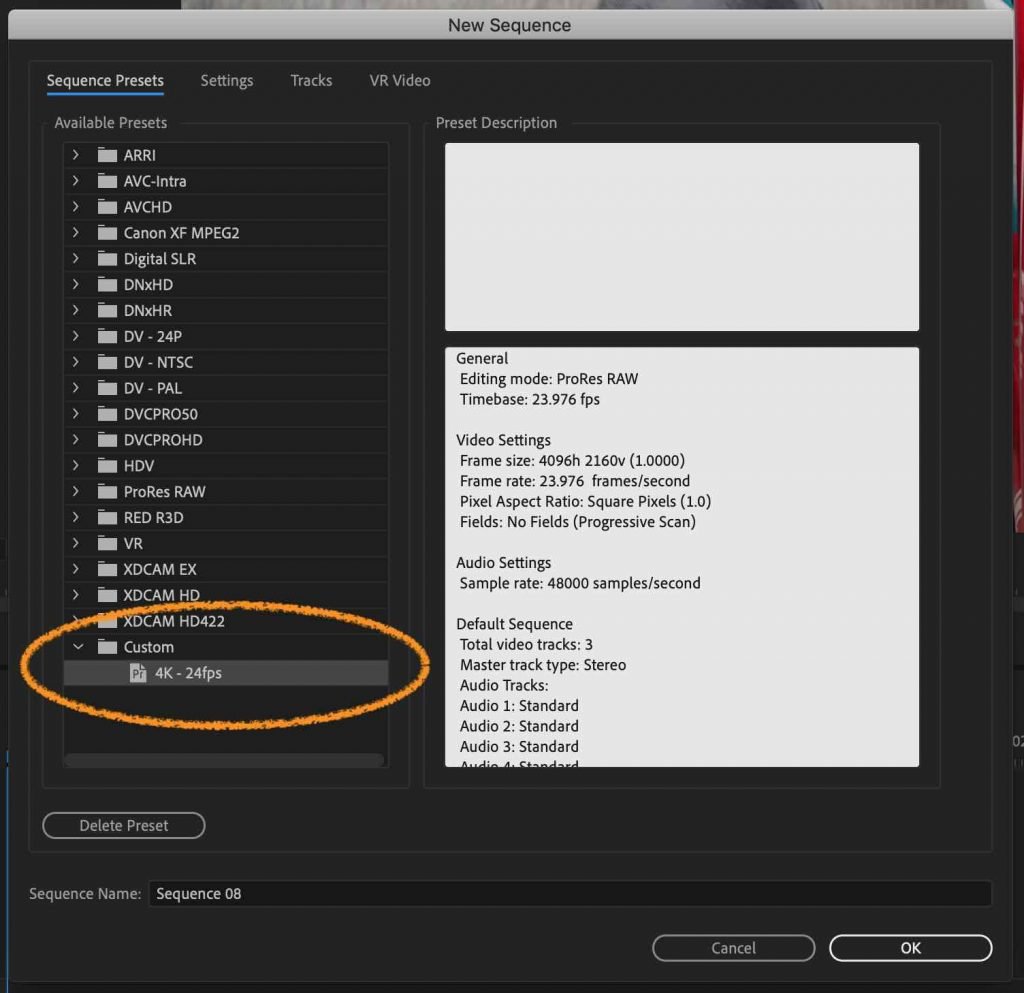
You'll now see your preset populate in the 'Sequence Presets' menu and you can choose information technology from that menu for any future project in Premiere Pro.
Source: https://www.handcraftfilms.com/blog/sequence-settings-premiere-pro/
0 Response to "How To Set Sequence Settings In Premiere"
Post a Comment